Deploy WordPress website on AWS
AWS EC2 Instance?
Amazon EC2 (Elastic Compute Cloud) offers virtual servers (instances) in the cloud. These can be customized based on your needs, with various sizes and types available. You can choose operating systems, scale easily, control networking, ensure security, and connect with different storage options. EC2 is in various regions, each with multiple zones for reliability. Pricing includes pay-as-you-go, reserved, and spot instances. It's used for diverse tasks, from hosting to data analysis, due to its flexibility and scalability.
AWS RDS?
Amazon RDS (Relational Database Service) is AWS's managed database solution. It simplifies database setup, maintenance, and scaling for MySQL, PostgreSQL, Oracle, SQL Server, etc. It automates backups, offers scalability, high availability, security, and easy migration. RDS is ideal for businesses seeking efficient, hands-off database management in the cloud.
Apache Server?
The Apache HTTP Server, colloquially called Apache, is a free and open-source cross-platform web server software, released under the terms of Apache License 2.0. Apache is developed and maintained by an open community of developers under the auspices of the Apache Software Foundation.
IAM Role?
An IAM role is an IAM identity that you can create in your account that has specific permissions. An IAM role is similar to an IAM user, in that it is an AWS identity with permission policies that determine what the identity can and cannot do in AWS.
Task-01
Step-01: Let's create an EC2 instance for our WordPress site on AWS.Give it a name and select the Ubuntu Server 20.04 LTS (HVM), SSD Volume Type AMI.
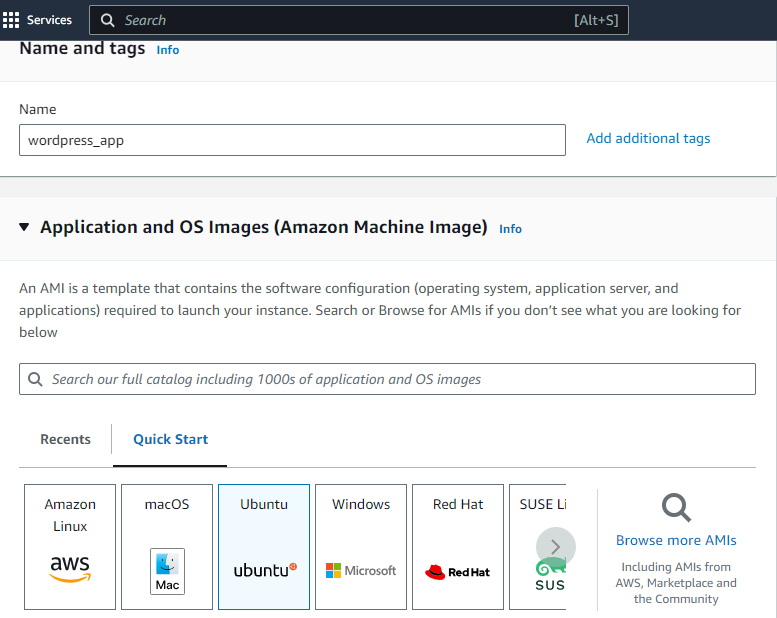
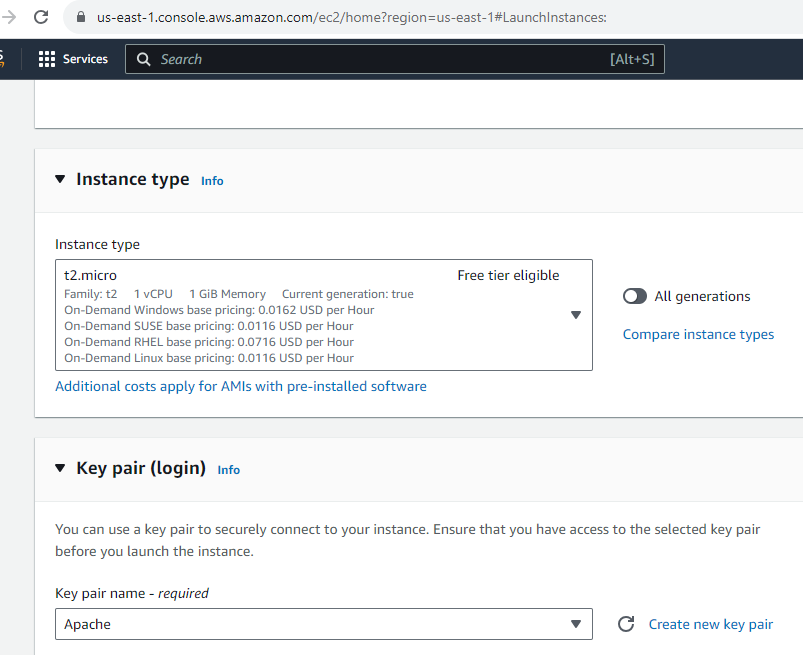
- Step-02: Select the
t2.microinstance type and key pair.
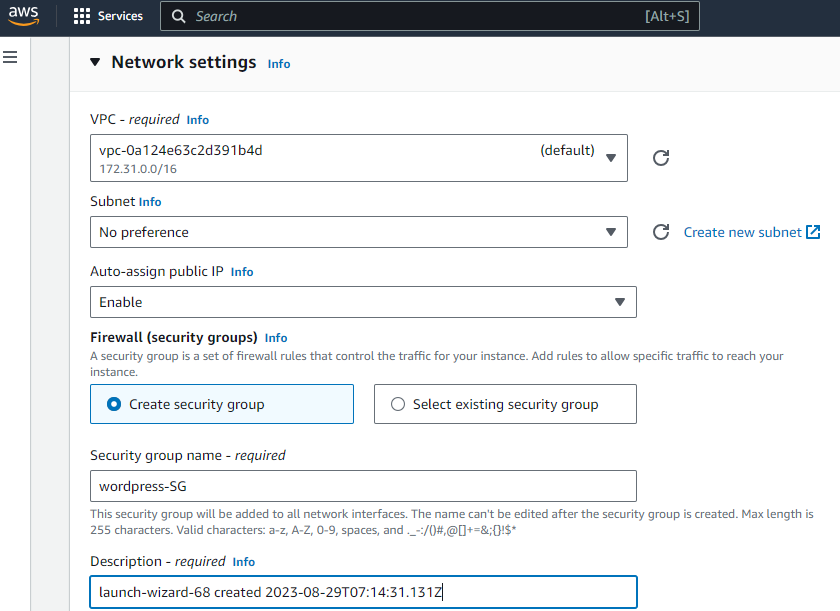
- Step-03: Create a
new securitygroup and add the followingrulesto it.
- Step-04: We have created our EC2 instance.
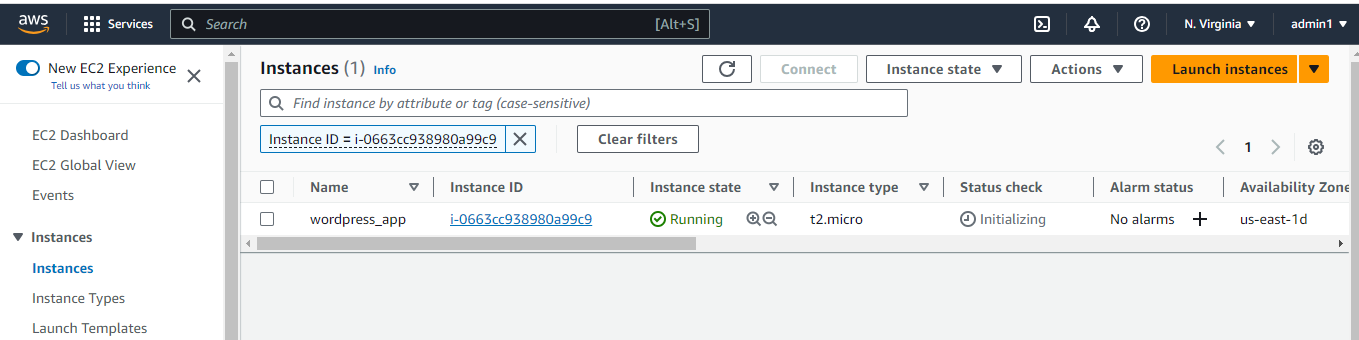
Now let's create an RDS for our WordPress site.
Step-01: Search for
RDSin theAWS servicesand selectRDS.Step-02: Click on
Create database.

- Step-03: Select
MySQLas theDatabase creation method.

- Step-04: Select Engine Version and then Select
Free tierinTemplates.

- Step-05: Now we will set the
DB instance identifierandMaster usernameandMaster password.
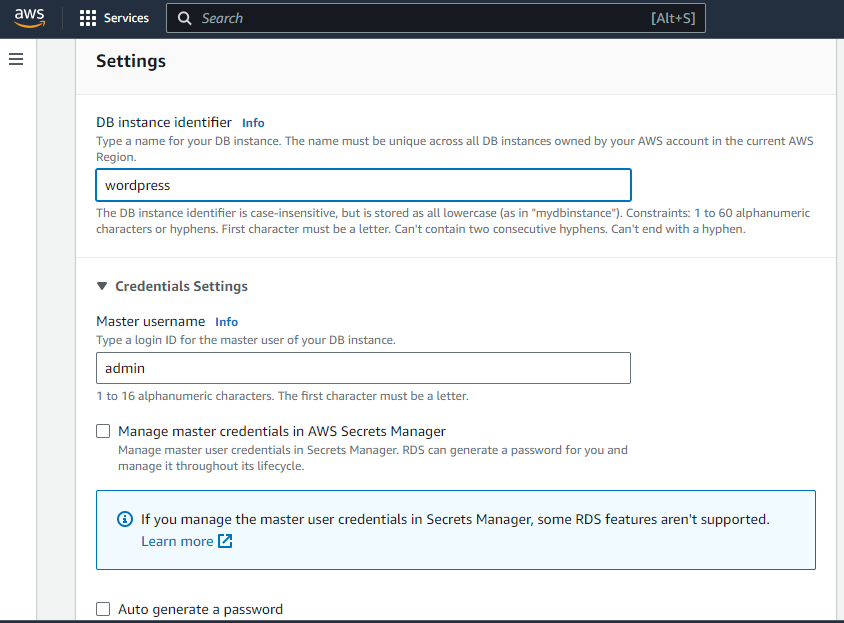
Step-06: Let the instance and storage type by default and click on
Create database.Step-07: Now check the connectivity of the database by clicking on "Don't connect to an EC2 instance" and VPC is the default.

- Step-08: Configure the Additional Setting by adding a name to it.

- Step-09: Click on
Create Databaseand check the dashboard for your database.

Now let's configure the AWS Relational Database Service or RDS with our EC2 instance.
- By giving the network connectivity to our EC2 instance.So Open AWS RDS.

- In the RDS console > Select the database > Click on Connectivity & security > Select VPC security groups > Click on Edit > Select the security group > Click on Save.

- Go inside the Security Group > Click on Inbound rules > Click on Edit inbound rules.

- Click on it and add the source as the Security group we created earlier while creating an
EC2 instanceand click on Save rules.

Now let's create an IAM Role for our EC2 instance to access the RDS instance.
- Step-01: Go to
AWS Console>>Services>>IAM>>Roles>>Create Roleand also select EC2 as the service.

- Step-02: Add the
AmazonRDSFullAccesspolicy to the role.

- Step-03: Give a name to the role and create the role and review it.

- Step-04: Now check whether the role is created or not.

- Step-05: Now go to
EC2and select theInstanceand click onActions>>Instance Settings>>Modify IAM Role.

- Step-06: Select the role which we created previously and click on
Save.

- Now let's connect to our EC2 instance using SSH.
- Now let's install MySQL-client in our EC2 instance.
sudo apt update
sudo apt-get install mysql-client
mysql --version
- Go to RDS Console > Open the
Database you created> In the details of your Amazon RDS database, the hostname will be shown as the Endpoint in the Connectivity & Security section.

- Here we are connecting the RDS Database with mysql-client in our EC2 instance.
export MYSQL_HOST=<your-endpoint>
#export MYSQL_HOST=wordpress.caxt8wmsdc7r.ap-south-1.rds.amazonaws.com
- Now let's fill in the Master username and Master password which we created while creating the RDS instance so that it verifies and give access to mysql.
mysql --user=<user> --password=<password> wordpress
#mysql --user=admin --password=test@123$ wordpress
- Now let's Install a Server where we can Host our Website for that we have used Apache Server.
sudo apt update
sudo apt install apache2
- Now let's check the status of the Apache server. Open the Public IP of your
EC2 instancein the browser.
- Now let's create a Database for our WordPress site.
CREATE DATABASE wordpress;
CREATE USER 'wordpress' IDENTIFIED BY 'wordpress-pass';
GRANT ALL PRIVILEGES ON wordpress.* TO 'wordpress';
FLUSH PRIVILEGES;
Exit
After this let's Download and COnfigure the WordPress.
wget command is used to download WordPress.
wget https://wordpress.org/latest.tar.gz
- Now let's extract the tar file.
tar -xvzf latest.tar.gz
- After Extracting
change the directoryto WordPress and create a copy of the defaultconfiguration filewhich is (wp-config-sample.php).
cd wordpress
cp wp-config-sample.php wp-config.php
- Now let's edit the wp-config.php file.
vim wp-config.php
- First, We will edit the database name and database user and database password.
- Now let's Deploy the WordPress site, but before that, we need to install some dependencies.
sudo apt install php libapache2-mod-php php-mysql -y
- Now let's copy the WordPress files to the Apache root directory.
cd ..
sudo cp -r wordpress/* /var/www/html/
sudo systemctl restart apache2
- To check whether the website is running or not open the Public IP of your
EC2 instancein browser.
http://<public-ip>/wp-admin

Thus we have successfully deployed our WordPress site and also connected it with the RDS instance.


